Wind Shielding Basics and a Low Cost Solution
It’s one of those basic facts that if you want to go wildlife sound recording, you have to protect any microphone used from the effect of air passing by it, i.e. wind. The effect of wind on a microphone shows itself as a blasting sound that can completely obliterate the sound you wish to record.
There are a few basic requirements needed for wind shielding:-
- Whatever used should not restrict the sound getting to the microphone. It should be as acoustically transparent as possible.
- There is a need to create a framework around the microphone which will suspend the main wind shielding fabric at a distance from the microphone capsule. This sphere of space around the microphone capsule should equate to 4x the diameter of the capsule if at all possible. Anything less than that and you could be in a compromise wind situation. This space should give a “sphere of tranquility (still air)” around the microphone.
- The fabric that forms the outer membrane of the windshield should be stretched as tight and as smooth as possible to maintain that transparency of sound. There are many fabrics that I have seen that keep the “wind” at bay, but they also restrict some of the sound, usually the higher frequencies getting to the microphone.
I know of one wildlife sound recordist who was very proud of the fact that he could put his mics out in any condition and not suffer any wind blast. The fact that a great deal of the sound could not be heard either, did not seem to bother him!!
The above criteria are not that easy to achieve. That is why Rycote et al wind shielding costs the amount they do. They have carried out a great deal of research work and designed the materials they now use, and very good they are to.
For those of us with limited budget, who use home made microphones, step forward the “jingly plastic dog ball”, and some fabric left over from something else I was doing.

Construction of the budget windshield.
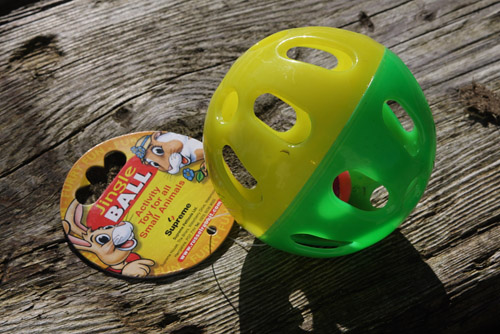
Please refer to photo 1 the ball as bought from the pet shop for £2.25, they come in various colours which would blind a bird at 100 metres and are made of quite tough plastic.
The first thing you need to do is remove the jingly ball as I feel this would interfere with the wildlife recording. The ball can be broken up into small bits by the careful manipulation of a long thin screwdriver or something similar. Once the offending article is removed, you need to create a tight fitting hole in the outer ball so that the microphone of your choice can slide snugly into position, with the capsule centered at the centre of the sphere. This maximizes the “sphere of tranquility” mentioned previously. I have made this fit snug by using plastic grommets obtained from Maplin.

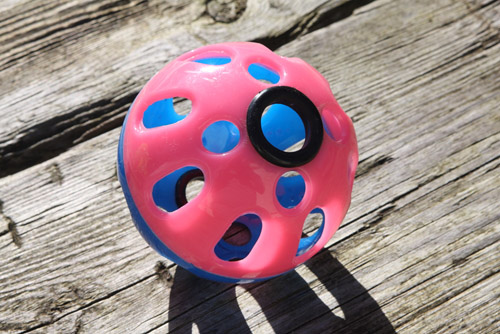
modified dog ball showing grommets for microphone
As you can see from photo 2 I repeated the process at the other side of the ball using a larger hole an associated grommet to fit other microphones of larger diameter, thus making the windshield very flexible in use. A word of caution here, making the holes in the ball was carried out very carefully with a rough hole drilled in the centered position and then enlarged gradually by filing.
If you are making the microphones a little pre thought on the tubing used would help at this wind shielding stage.
Finally, using the fabric of your choice; cut a piece large enough to completely cover the wind shield and a couple of inches down the stem of the microphone. Then take an elastic band and trap the material tightly to the stem of the microphone, ensuring a tight joint

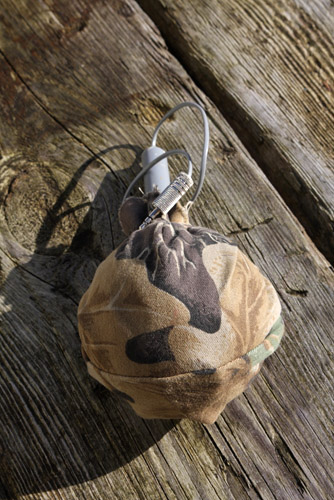
covered windshield
The finished article as shown in photo 3 has proved more than adequate when recording, I am sure many of you out there could make a better job of construction than I have done. But as they say about size and looks; as long as it works, and provides satisfaction, the job's a good one.
